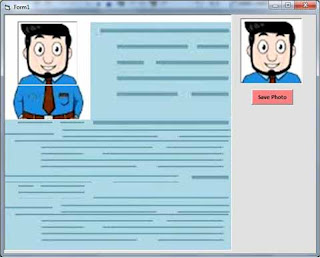
In this post we learn about how to Photo Crop in VB6.0 through Draw rectangle or Fix rectangle with code in SKOTechLearn. We will define that how to move a fix rectangle on Particular image and set it on a location for further image crop process.
There are many applications available on internet market. But, in all those applications have same process to draw rectangle to particular location and through mouse.
But, in my process, you have to only press on Left, Right, UP, Down Key press from keyboard to set rectangle for photo crop position.
 |
| Photo crop example |
Now this is the example of Crop Photo through Rectangle.
Controls Require for This Process:
There is following description to describe how many controls required with its Name properties.
Control
|
Name (Properties)
|
Picture1
|
MyPic
|
Picture2
|
Crp_Pic
|
Lable1
|
Crp_Lbl
|
Command1
|
Save_Pic
|
When you drag this control to your form, change every control’s Name like above mention Name. Remember one thing that you have to drag Label inside the Picture1 control for moving label left, right, up, down.
Now, let’s change some Properties of given control.
"MyPic" and "Crp_Pic" Properties Setting:
Properties Name
|
Change Type
|
Appearance
|
1 - 3D
|
AutoRedraw
|
True
|
AutoSize
|
False
|
MousePointer
|
2 - Cross
|
Properties Name
|
Change Type
|
Appearance
|
1 - 3D
|
BackStyle
|
0 - Transparent
|
BorderStyle
|
1 - Fixed Single
|
 |
| Control's Description and Properties |
How to Photo Crop Through Code in VB6.0?
Event's type with code for Photo Crop Process:
There is following types of Events, you have to remember.MyPic Event Type:
MyPic_KeyDown
Note: We use Label as Crp_Lbl for Area Selection for Crop. And for this process we will create a Class such as “CrpSelectionPic()”.
Now, let’s proceed in Coding. First we define some global variable like bellow.
Public SX1 As Single
Public SX2 As Single
Public SY1 As Single
Public SY2 As Single
Public P_Sel As Boolean
Create “CrpSelectionPic()” class and write code:
Private Sub CrpSelectionPic()

   Dim wd As Single
   Dim ht As Single
   Dim skt As Single

   With Crp_Lbl
      'Label moving position
      SX2 = Val(.Left) + Val(.Width)
      SX1 = Val(.Left)
      SY2 = Val(.Top) + Val(.Height)
      SY1 = Val(.Top)
   End With

   P_Sel = False

   If SX1 > SX2 Then
       skt = SX1
       SX1 = SX2
       SX2 = skt
   End If

   If SY1 > SY2 Then
       skt = m_Y1
       SY1 = SY2
       SY2 = skt
   End If

   wd = SX2 - SX1
   ht = SY2 - SY1
   If (wd = 0) Or (ht = 0) Then Exit Sub

   ' Set The capture size.
   Crp_Pic.Width = wd + (Crp_Pic.Width - Crp_Pic.ScaleWidth)
   Crp_Pic.Height = ht + (Crp_Pic.Height - Crp_Pic.ScaleHeight)

   ' capture selected area.
    Crp_Pic.PaintPicture MyPic.Picture, 0, 0, wd, ht, SX1, SY1, wd, ht
    Crp_Pic.Picture = Crp_Pic.Image

End Sub
This code is use to capture selected area through Label, when we press Arrow (UP,Down,Left, Right) Key from keyboard to move Label for desire area selection.
Learn ODBC with DSN connection in VB6.0 easy tips
After that write code inside “MyPic_KeyDown” events:
Private Sub MyPic_KeyDown(KeyCode As Integer, Shift As Integer)

   With Crp_Lbl

      'Move Lable Right to Right Arrow Key press from Keyboard
      If KeyCode = 39 Then
         .Left = .Left + 40
         CrpSelectionPic
      End If

      'Move Lable Left to Left Arrow Key press from Keyboard
      If KeyCode = 37 Then
         .Left = .Left - 40
         CrpSelectionPic
      End If

     'Move Lable Down to Down Arrow Key press from Keyboard
      If KeyCode = 40 Then
         .Top = .Top + 40
         CrpSelectionPic
      End If

      'Move Lable Top to Top Arrow Key press from Keyboard
      If KeyCode = 38 Then
         .Top = .Top - 40
         CrpSelectionPic
      End If

   End With

End Sub
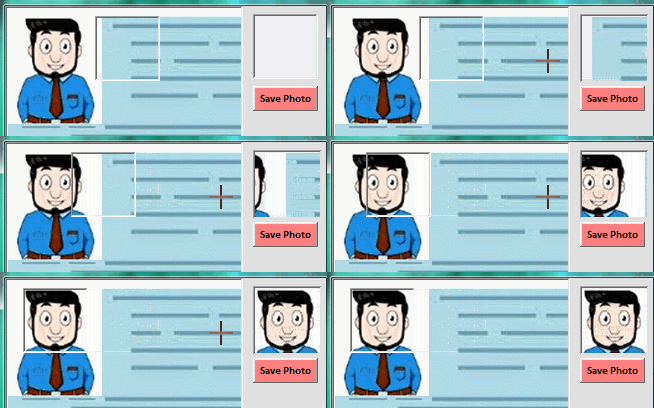
Keydown event is use to move Label Left, right, up, down for selection area by pressing key (Arrow Up, Arrow Down, Arrow Right, Arrow Left) from Keyboard.
 |
| Arrow Key to Area Select for Crop |
Private Sub Save_Pic_Click()

   SavePicture Picture2.Picture, "C:\MyCropPic1.bmp"
   MsgBox "Crop Image Saved Successfully.", vbInformation

End Sub

Photo Crop with Drawing Rectangle in VB6.0
Instruction:
(1). First Click on “MyPic” control.(2). Press “Arrow Key (UP, Left, Right, Down)" from keyboard for area selection as your desire.
(3). After Area Selection, Click “Save Photo” Button for save crop Picture.
Now, this is the simple short coding and design process to understand and you can learn that how to Crop Photo through moving fix rectangle in Visual Basic 6.0 code.
Learn Menu design and its features in VB6.0 Tips
Learn How to solve error of SendKeys() premission denied in VB6.0


Please provide source codes in zip format for better learning
ReplyDeleteThanks but not move able size of parts of pic
ReplyDeletehttp://itcollegeall.blogspot.com/p/faucet-script.html